Showing posts with label Quick Tip. Show all posts

8/31/2013

Guess What? More Christmas Cards!

Yes, it's not over yet. Here is a set of cards and a simple envelope lining:

Ja, es ist noch nicht vorbei. Hier ist ein ganzes Kartenset und ein selbstgemachtes Kuvertfutter:


The set was made with the My Mind's Eye Vintage Christmas collection again. 
When giving away a pretty card, it would be nice to have a beautiful envelope, too, wouldn't it? I thought so, this is why I made a simple lining for the envelopes:

Das Set habe ich wieder mit der My Mind's Eye Vintage Christmas Serie gemacht.
Wenn man schöne Karten verschenkt, wäre es doch toll, wenn das Kuvert dazu nicht so langweilig daher käme, oder? Hab ich mir auch gedacht, deshalb habe ich das Kuvert noch schön gefüttert:

To create a template for a lining, I just opened one of the envelopes, took a piece of cardstock and traced around the flap of the envelope with a pencil. Then I extended the lines some centimeters towards the bottom and cut everything out. Now I have a template for all my envelopes:

Um eine Vorlage für mein Futter herzustellen, habe ich einfach ein Kuvert geöffnet, mir einen Karton gesucht und dann darauf mit einem Bleistift um die Umschlagsklappe gezeichnet. Dann habe ich die Linien ein paar Zentimeter Richtung Boden verlängert und alles ausgeschnitten. Jetzt habe ich ein Muster für alle meine Umschläge:


Have a beautiful weekend everybody! 

Habt alle ein tolles Wochenende!

Vanessa

supplies:
MME pp, sticker, rhinestones, stamps - Scrapbook Werkstatt stamp

6/18/2013

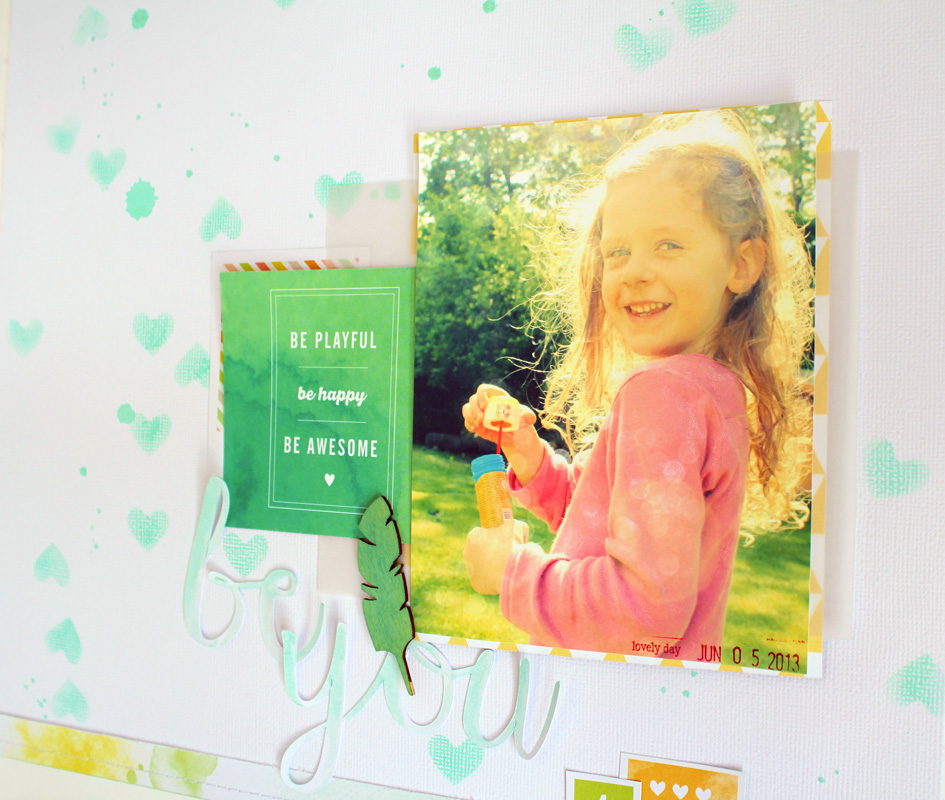
Be You

Today comes a layout. I so love this photo. It captured her character so well :)

Heute gibts ein Layout. Ich liebe dieses Foto so sehr. Es hat ihr Wesen so toll eingefangen :)


I used a mix of various AC lines. Everything I thought would go well with this photo. If you are wondering how I did the background, here is the easy how-to:

Ich habe eine Auswahl verschiedener AC Serien verwendet. Alles was meiner Meinung nach zu dem Foto passt. Falls Ihr Euch fragen solltet, wie ich den Hintergrund gemacht habe, hier ist es ganz kurz gezeigt:


This heart stencil isn't a real stencil, but one of these die cut cards from the AC Lucky Charm collection. But they make great stencils, especially if they don't get too wet.
Ok, that's it for today. One more day and I am off! Thanks for visiting!

Diese Herzmaske ist keine richtige Maske, sondern eine dieser Die Cut Karten aus der AC Lucky Charm Serie. Aber sie geben tolle Masken her, vor allem wenn sie nicht zu nass werden. 
Ok, das wars für heute. Noch ein Tag und ich bin weg! Danke fürs Besuchen!

Vanessa

supplies/Material:
American Crafts pp - American Crafts Die Cut Card - American Crafts Cardstock - Faber Castell Gelato - Studio Calico Wood Veneer

3/21/2013

Sweetheart & Quick Tip

The March Creative Weekly challenge on the Crate Paper blog is: Wings. Now, how could I NOT participate and create something using butterflies :) Still love my winged little friends. Here comes the layout I made last night:

Der März Creative Weekly Wettbewerb auf dem Crate Paper Blog lautet: Flügel. Naja, wie könnte ich daran NICHT teilnehmen und etwas mit Schmetterlingen zaubern :) Ich liebe meine kleinen, beflügelten Freunde. Hier kommt das Layout, das ich letzte Nacht fertiggestellt habe:


The gorgeous background paper is from DIY Shop. I stamped soft butterflies with aqua ink onto it. Don't you love that fabric frame? It's from Maggie Holmes' line. To match the stitching on the frame, I stitched the paper strips on the layout in a similar way. Oh, and the droplets on the layout were made with gelatos. LOVE how they turned out! So soft and shimmery. Here comes how I made them:

Das wundervolle Hintergrund Papier ist von der Serie DIY Shop. Ich habe darauf zarte Schmetterlinge in Helltürkis gestempel. Und findet Ihr diesen Stoffrahmen auch so toll? Der ist aus der Maggie Holmes Kollektion. Um das Genähte auf dem Rahmen wiederaufzugreifen, habe ich die Papierstreifen ähnlich genäht. Oh, und die Spritzer auf dem Layout habe ich mit Gelatos gemacht. Ich LIEBE es, wie die geworden sind! So zart und schimmernd. Hier seht Ihr, wie ich sie gemacht habe:


Just rub the gelato onto an acrylic block, spritz with water, mix with a brush and flick the wet brush over your paper. Voilá!

Einfach den Gelato auf einem Acrylblock verreiben, mit Wasser anspritzen, mit einem Pinsel verrühren und den nassen Pinsel über Euer Papier schnalzen. Voilá!

Vanessa

supplies/Material:
pp, chipboard stickers, fabric frame, die-cuts, buttons/Designpapier, Chipboard, Stoffrahmen, Die-Cuts, Knöpfe: Crate Paper
Gelatos: Faber Castell
stamps/Stempel: Hero Arts, PTI